Ways to Consider Water in Your Permaculture Garden Design

Posted on June 29, 2021June 29, 2021

Permaculture water features can both serve important functions and enhance the visual appeal and amenity of a space.

In a permaculture garden, water is always an important element to consider: You need to think carefully about water in all permaculture designs.

As a permaculture designer, I know managing water effectively in a garden can be about more than just best ecological practices. Permaculture water features can both serve important functions and enhance the visual appeal and amenity of a space.

Below are a few examples of permaculture water features from three of my recent projects. These ideas spotlight how permaculture designs can be beautiful as well as useful and can help you think about how you can include water in your garden designs.

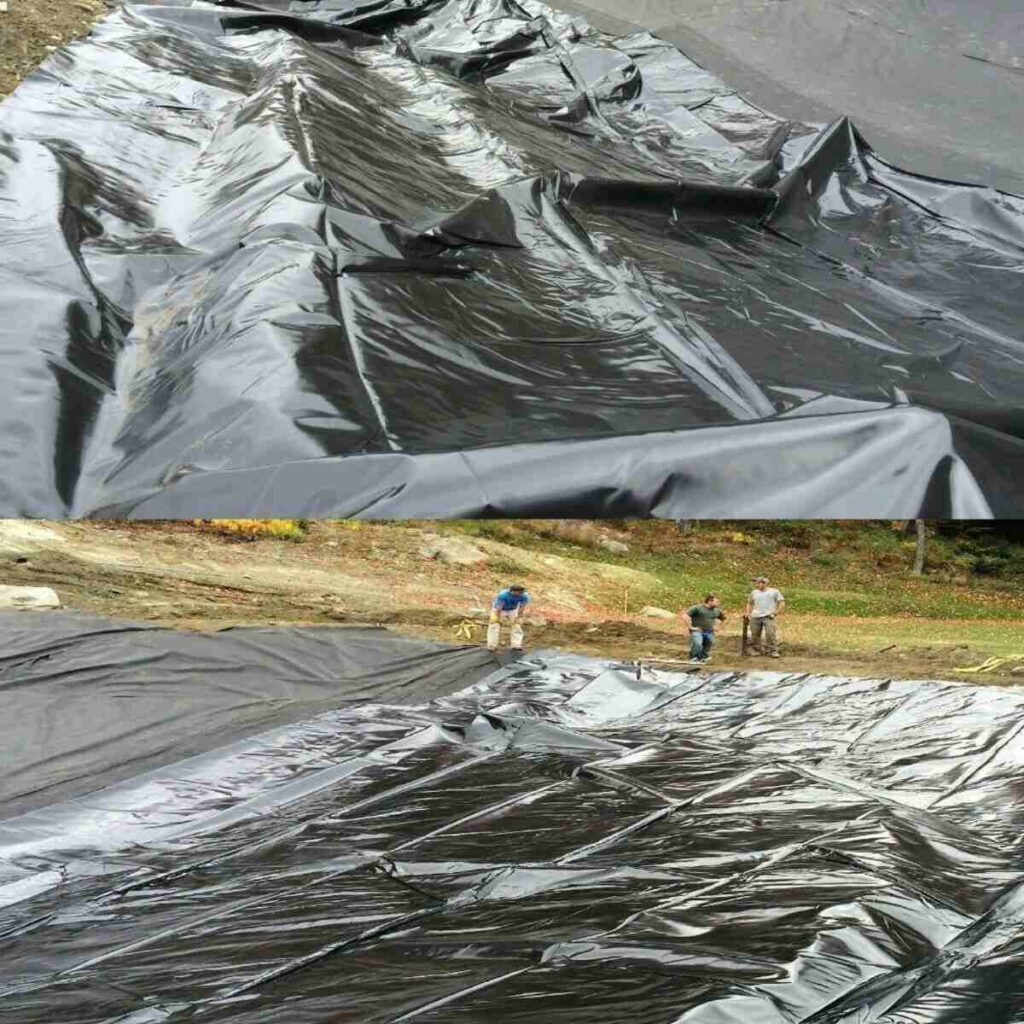
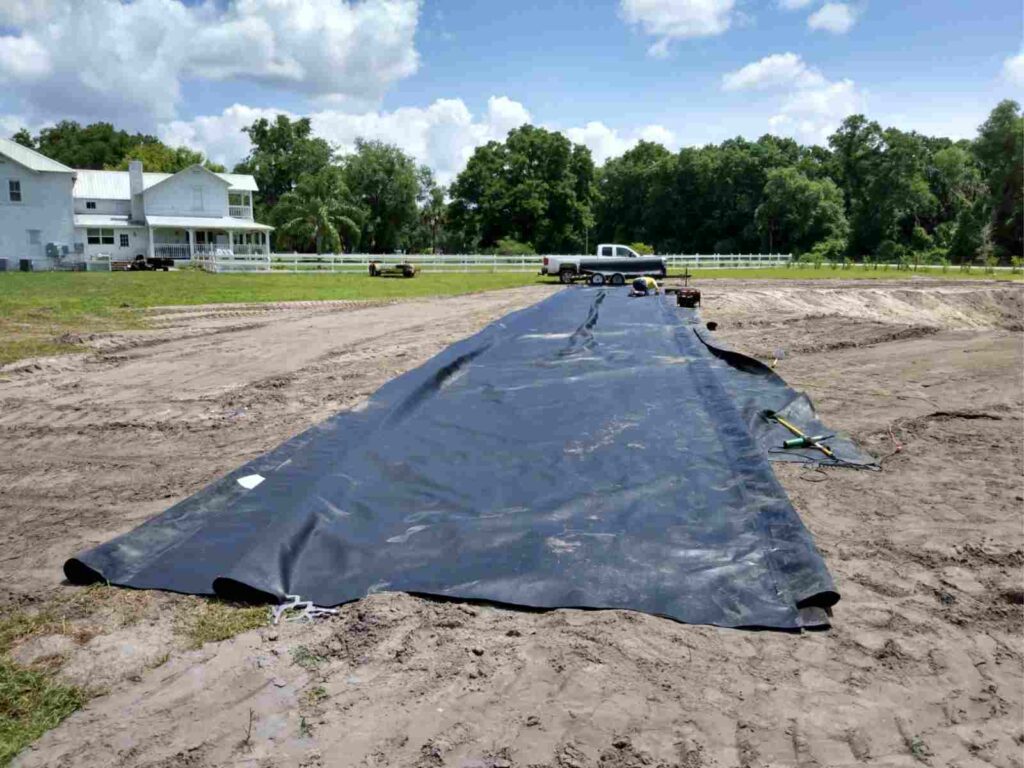
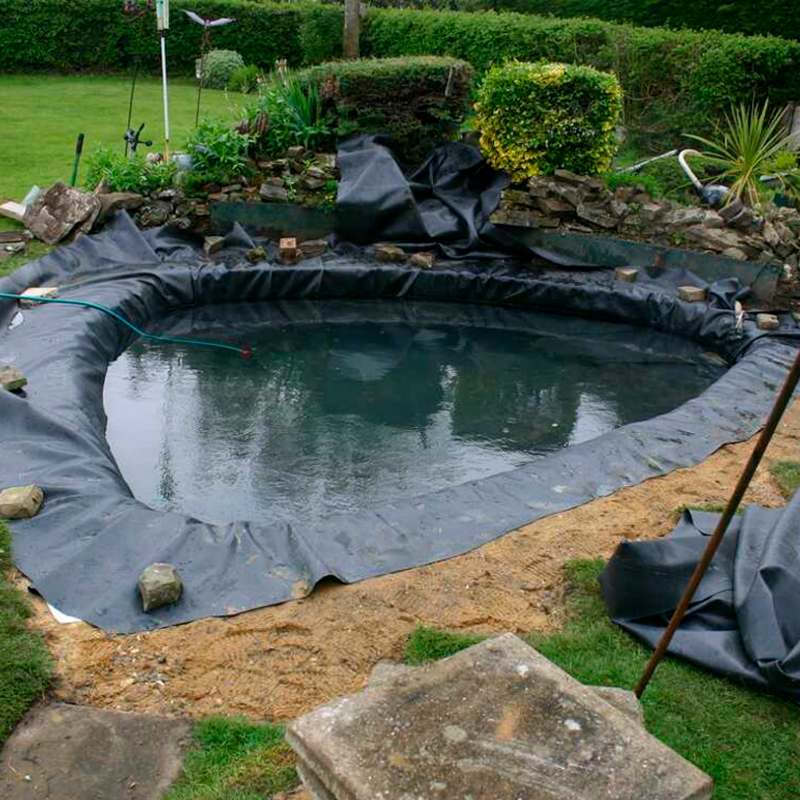
Permaculture Ponds and Wetland Chain

This larger water feature was a key component of the design, and will greatly enrich both the visual appeal and biodiversity of the farm site.

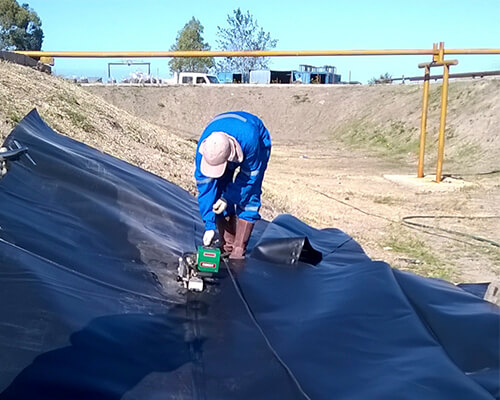
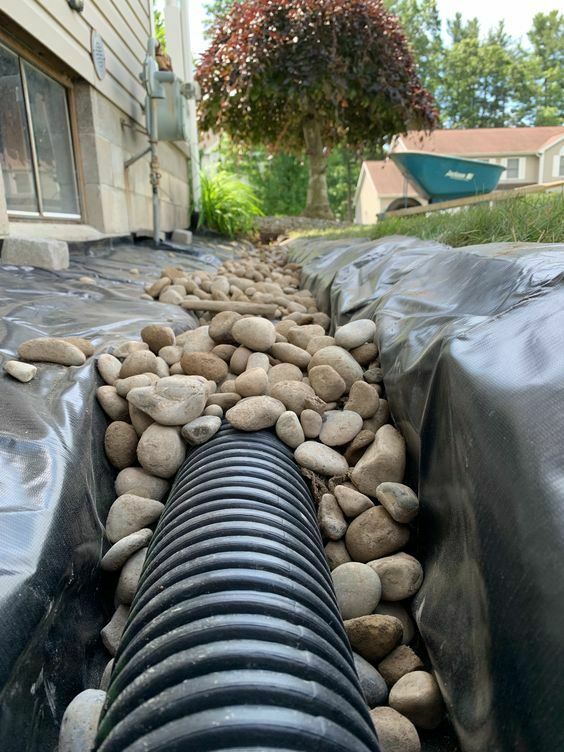
A Gravity-Fed Waterfall and Canal Irrigation Feature

I also recently worked on an artist's garden in Scotland. The artist in question wished to create a dramatic water feature of some kind, to create an attractive vista. She also wanted to make her garden not only a beautiful space but also one which was as productive as possible. 
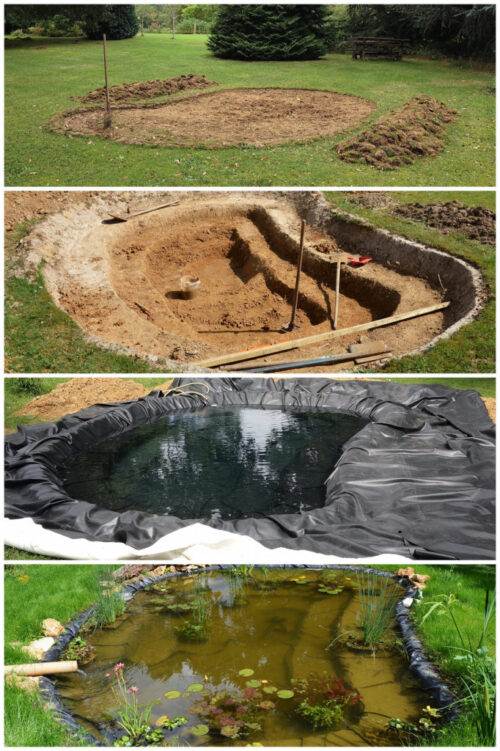
The garden was largely level but had a steep slope at the northern end of the space. We decided to create a pond near the highest point in the garden, collecting water from the slopes above, and feed water naturally down from here via a rocky waterfall feature to a canal, feeding a second pond, and irrigation for a polyculture flower and vegetable garden. The whole permaculture water feature was designed to be visually appealing, while also managing water flow effectively to make the most of the natural rainfall and retain as much water on the site as possible.

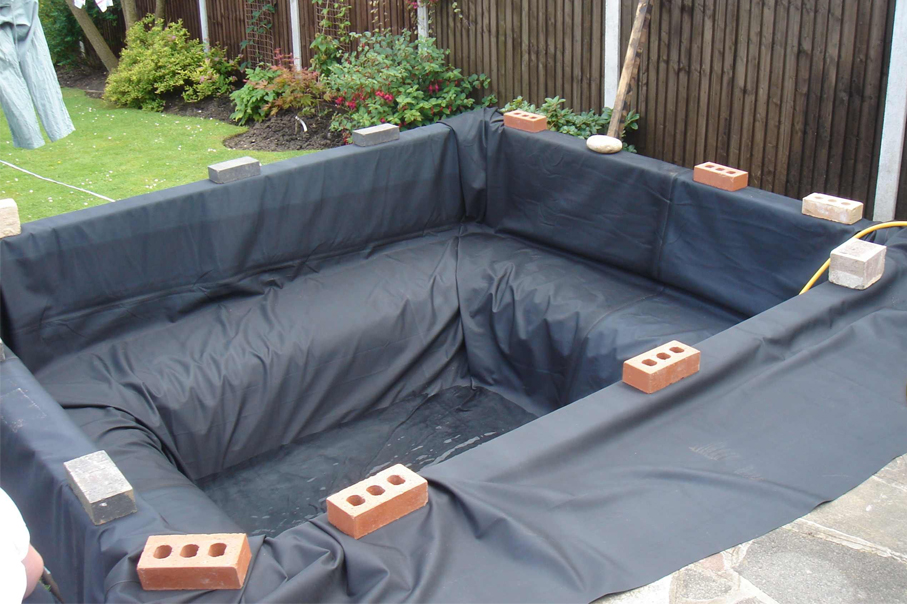
Ponds With Chinampas and Aquaponics Integration

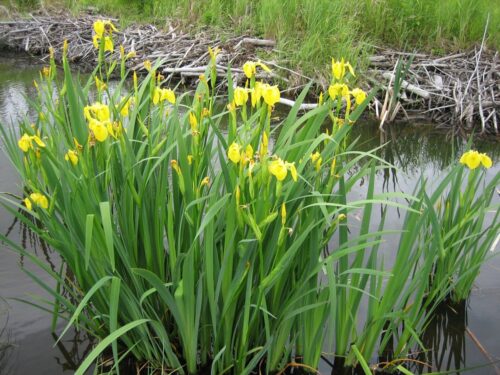
Ponds cannot just be visually appealing and biodiverse features to add to a garden. The ponds themselves can also be food-producing features. I have designed ponds that have chinampas (rafts of vegetative matter) build in/ on them in which produce can be grown. Of course, many other edible pond plants can be integrated into and around the edges of the pond, including a number of aquatic plants and marginals.

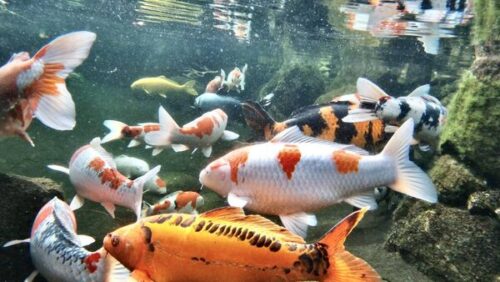
Another excellent idea and common permaculture element involve integrating a pond into an aquaponics system. The pond contains fish, which fertilize the water. And this water can then be pumped around a hydroponic growing system in a range of different ways.

One interesting idea is to place a pond partially inside and partially outside a polytunnel or other undercover growing area. The diverse habitats which can be created can increase diversity and open up a range of other interesting options for integration.

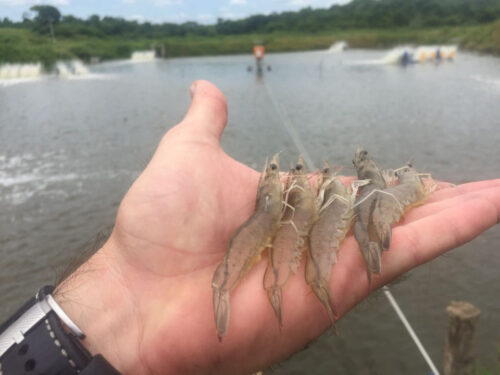
Adding a body of water inside a polytunnel or greenhouse structure can aid in temperature regulation through adding thermal mass, which can bring an increased range of possibilities when it comes to what you can successfully grow inside. The higher temperatures in an undercover growing area can also potentially allow you to rear different fish in cooler temperate climate zones, so this is something else to consider.

These are just a few ideas from my own design work, and there are plenty of other interesting and intriguing options to consider when it comes to managing and using water in your garden. The key thing is to think about the best options for your particular site. Each site is different and comes with its own unique range of challenges and opportunities. Always design for the terrain and the climate and the characteristics of your area.

I hope that these ideas will serve as an inspiration and help you think big and outside the box when it comes to adding water features in your own permaculture garden.

DO YOU KNOW HOW TO REPAIR HDPE GEOMEMBRANES?

Posted on June 29, 2021June 29, 2021

With the massive fall of leaves and species beginning to dry up, the spaces housing water and plants in the garden now require certain tasks to see them splendorous again in spring.

when autumn arrives, the main care for the health of the pond and the aquatic plants that inhabit it is to avoid the incorporation of large amounts of organic matter, either by the fall of leaves characteristic of this time, or by the species palustres, floating and rooted that dry up with the first frosts.

The decomposition of all this material in the water body generates a double problem. On the one hand, the gases caused by fermentation, dissolved in water, can affect fish; on the other hand, the nutrients caused in this process serve as food for algae, especially at the beginning of spring, when they proliferate.

To avoid these problems, the most effective option is to cover the water with a net that prevents the entry of leaves or, if possible, with a transparent nylon. This not only serves the same function, but also acts as a greenhouse, prolonging the growth and flowering of some species, allowing us to continue enjoying the pond. If it is not possible to cover it, remove the leaves on the surface with a flake or net and clean the mulch that accumulates on the bottom.

Also at this time it is necessary to prune all the dry or burnt material by the cold, especially that of the palustres and floating, which is the most voluminous.

Solutions start at the very moment we plan the construction of the pond, looking for places that are away from deciduous trees. This will not only prevent a massive fall of leaves in the water, but also the possible breakage of the pond by the action of the roots.

Another topic to keep in mind about the care of ponds in autumn is to know which wind predominates in the area and which is its main direction. In this way, it is avoided to drag the fallen material towards the pond. One solution is to place high marsh species as a barrier.

All you need to know about buying and keeping pond fish

Posted on June 29, 2021June 29, 2021

Summer is an ideal season for buying fish for your garden water feature. Here's your guide to choosing and caring for them

New ponds need two-three weeks for the biology to mature and settle. Don’t be in a rush to stock the pond.

Pond filters have a media that helps the ecology and pH balance of the water. This can benefit from both time and the addition of commercial bacteria (bought as a gel).

Summer is an ideal season for buying in fish. In winter, fish kept inside can go into shock if dumped into a cold pond below 15C in temperature.

Float the bags containing your new fish on the water’s surface for at least half an hour to acclimatise them to the temperature. Opening the bag, drift in a little pond water over the next half hour, before releasing the fish gently and quietly/

Ratios vary by species, but for goldfish, the most popular and un-fussed pond fish – five fish will require in the area of 1,000l of water. If your non-native fish outgrow the pond, gift or sell them — don’t drop them in an Irish river!

Every fish pond needs filtering and even then you should test the water periodically to ensure the nitrate and potassium levels and general hardness (GH) are all healthy.

Together with koi, goldfish, black moor and shubunkins, you can keep native Irish freshwater fish in your pond including rudd, tench and carp (goldfish are actually a coloured type of carp).

Depending on the species, some fish types can grow exceptionally large and be predate other smaller fish. Get advice from your fish supplier for safe introductions.

There are various ways to keep herons, cats, mink and other predators out of your pond, ranging from jets of water set off by sensors, to nets and electric fencing (which looks pretty awful).

Surface feeding fish will be most vulnerable. The Heron Stop Reflector is a ball with a beady eye that sits on the water, terrifying herons.

Green water in your garden pond?

Posted on June 29, 2021June 29, 2021

With the arrival of spring, those of you with water features are getting them ready. Summer is the most challenging time of year for pond and water feature enthusiasts


Keeping pond water clear and clean in 90-degree heat with 16 hours of sunlight takes some advance preparation. This is because water temperature is the key to controlling pond algae.

There are many tricks for keeping pond water cool, and you should use as many as you can.

One way is with water plants. Experienced water gardeners store stock up on annual pond plants early in the year; “floaters” like water lettuce and water hyacinth.

These plants multiply rapidly on the pond surface, forming a living “umbrella” that casts shade on the water. Perennial water lilies are also very helpful in keeping sun from warming pond water.

By August, vegetation should cover most of your pond’s surface.

Ponds in direct sun all day are the hardest to manage. You can use plantings along pond banks, particularly on the southwest side, to shade the water during the hottest part of the day.

Overhanging shrubs and ornamental grasses work well, and so do trees. There are lots of perennials that thrive along pond banks or in shallow water. These plants are called “aquatic marginals,” and many of them are perennials that will come back each year.

In addition to making a natural appearance, they help create a balanced environment around ponds that helps control algae.

Keeping water rapidly moving is another important aspect to controlling “green water” in your pond. Waterfalls and fountains mix in fresh oxygen to keep water from becoming stagnant. Rapidly moving water prevents “hot spots”, mixing cool subsurface water constantly.

To prevent “hot spots”, water should circulate completely from one end of the pond to the other, twice each hour. Make sure your pump is sized large enough. A 1000-gallon pond should have at least a 2000 gallon-per-hour pump (or larger if the pump “lifts” water up a hill or to a waterfall).

To prevent “hot spots”, water should circulate completely from one end of the pond to the other, twice each hour. Make sure your pump is sized large enough. A 1000-gallon pond should have at least a 2000 gallon-per-hour pump (or larger if the pump “lifts” water up a hill or to a waterfall).

Rocks and pebbles equalize the night and day temperatures, cooling the water by day and warming it at night. Gaps between stones give fish a place to hide from predators, and act as natural filters by harboring beneficial bacteria.

A healthy living pond environment provides enough food for goldfish and snails, who help keep the pond clean. Fish wastes, in turn, help feed pond plants.

Overfeeding of fish is a major cause of algae bloom in water features. We stock our pond with bait goldfish, and never add fish food of any kind.

The fish thrive by eating mosquito and frog eggs, tadpoles, algae and insects, scrubbing the pond naturally.

Every water feature has “issues” with string algae, particularly during the summer months. We recommend fish-safe, plant-safe algae control products like AlgaeFix and barley straw, and use them in our own pond, but they are only one ingredient in a successful “recipe” for clean, clear water.

The key to clear water is a healthy balance of good design, water circulation, plants and fish.

These elements create a healthy environment similar to natural stream beds, where plants, insects and animals live in harmony in clean, clear water.

How to create a pond or water feature in a garden of any size

Posted on June 29, 2021June 29, 2021
  • Home
  • How to create a pond or 

Whether you live in the country, city or suburbs, there's plenty of scope for self-building a traditional pond

POND POWER

You can put a conventional pond anywhere that you can access it on all sides that are not truly boggy. Can you reach the spot with the necessary power for aerating pumps, filters, UV filters or lighting? Larger waterfalls moving 1000s of litres per hour may require a soil filter. Some waterfalls will turn over their entire capacity of water every hour. For less elaborate setups, wireless solar-powered pumps and small (50cm) fountains, alone or matched to a battery to take them through the night, can remove the need for any mains help.

SITE AND SHAPE

To lay out the pond before slipping disc, use a garden hose or trickling white sand to site the pond in semi-shade (too much sun will just crank up your algae count). If you’re looking for something urbane; a straight-sided pond, set into the ground or more typically with raised walls can form part of stunning, hard landscaping. Generally, if you want to indicate natural features, rambling curves are key. Be wary of areas where there may be any undesirable run-off into your pond.

SIZING

The size and depth of the pond will be dictated first by the types and number of any fish you might include. Dedicated wildlife ponds are best left fish-free. If you’re determined on specimen koi carp (my father has some scaly old pets as long as my leg) a pond of 1.5m-2m will be predetermined to allow them to go deep enough to keep warm and semi-hibernate in winter. Don’t over-populate. Once they grow to specimen size and start breeding, apart from unpleasant crowding, the pump and filters will be thrumming loudly to keep the water clean.

DIGGING OUT

A flat spade and a strong back will suffice for a simple pond without blockwork. You will want to keep the sod and soil to create surrounding features, perhaps a site for a waterfall, a bank around the pond or shelving at the water’s edge. Ensure there are no utility lines set under the lawn or drainage pipes in your way before cleaving the ground. Remove stones that could pierce the liner once heavy with water. Use a long piece of wood and a spirit level to check the pond is level, side to side on completion. Another solution to raise the sides? Consider creosote-free timber sleepers bolted together and fully lined.

LINERS

With the site dug out correctly, and presuming we’re using a flexible quality butyl liner you will need: soft underlay, a quantity of soft sand, edging material and as much familiar support as you can beg for.

The most recommended liner to create your pond is the HDRPE material. A thick, durable, HDRPE liner, is a versatile material that is used widely across all applications. HDRPE can also be used in a multitude of secondary containments, pond linings, and water containment projects. HDRPE is best used as an exposed lining material and has the UV resistance required for many years of outstanding service.

PLANTING

Together with pumps and filters to move, oxygenate and crucially, clean the water, the right plants offer a passive solution that not only look great but that will save you work. Perennial marginals can really help to pull damaging nitrates out of the water. Don’t overstock or it can unbalance the ecology of the pond. They can be introduced in multiple ways suited to their natural level in the water, set into low walled planting pockets and even segue onto a bog garden with graceful sentries like Lobelia cardinalis and flag iris/Iris pseudacorus. Baskets filled with aquatic compost allow plants to be neatly contained and moved when required.

10 tips for shrimp farming – the basics

Posted on June 29, 2021June 29, 2021

Shrimp farming isn't easy - but getting the basics right can keep your ponds productive and disease-free.

1. Sterilise everything

Sterilisation is an important step to provide a disease-free environment for the shrimp. Before stocking begins, it is important to sterilise all aspects of the farm – the pond itself, all the equipment and the culture water – to make sure that pathogens are eradicated and the risk of disease minimised.

- Pond and equipment sterilisation

First, clean the pond and equipment with high pressure spray containing disinfectants. It is recommended to use 10 ppm of trichloroisocyanuric acid (TCCA) and 30 ppm of sodium hypochlorite. See below for the recommended exposure time and concentrations for chlorine disinfection.

After disinfection, scrub the pond lining to make sure that the biofilm is lifted. Then, remove all the leftover sludge from the previous cycle as this is a source of pathogens and harmful components. If the farm suffered from disease outbreak in the previous cycle, use lime with a pH up to 11 to eradicate spores and prevent further outbreaks in the next cycle

- Water sterilisation

Water sterilisation requires two steps: prefiltration and disinfection. For prefiltration, use filters with a mesh of less than 200-300 microns at the water inlet to prevent entry of pathogens, predators and undesirable settleable solids. The filters should be maintained regularly by rinsing them with clean water and removing any deposits.

As for water disinfection, use chemical disinfectants to eradicate all the pathogens. Apply 20–30 ppm of sodium hypochlorite 60 percent, 0.5–2.5 ppm of KMnO4 and 10 ppm of TCCA to the filtered water for 24 hours. Maintain full aeration during chemical disinfection. To remove the leftover chlorine, use the right amount of sodium thiosulphate by multiplying the leftover chlorine concentration by three. Finally, apply it two to seven times over 24 hours.

2. Improve your biosecurity

In shrimp farming, biosecurity is often disregarded as a mere addition of unnecessary infrastructure and complex procedures with unclear monetary benefit. However, the importance of biosecurity cannot be overstated since it is one of the key ways to prevent disease in a farm and also further outbreaks in the region; it benefits not only one farmer but also the whole neighbourhood.

Biosecurity works by preventing pathogen entry and excluding pathogens from the farm. Here are some of the simplest biosecurity measures you can start to implement at your farm.

* Use a pond liner – the most commonly used material is high-density polyethylene (HDRPE). Using a pond liner allows easier water control since the water does not interact directly with soil, an interaction that could trigger a complex anoxic reaction, which is highly toxic for the shrimp.

* Protect the farm with fences – to prevent wild animals, such as crabs, which may carry undesirable pathogens, from entering.

*Control the movement of people and vehicles – it is important to make sure that all employees and visitors go through disinfection and cleaning procedures before and after entering and working. All vehicles should go through the same procedures before entry and exit.

* Place feed and probiotics in a specific storage room – to maintain cleanliness, prevent contact with outside vectors which may carry disease, and to provide a more stable temperature for better feed maintenance.

* Make sure there are labs available in the area – labs are important for two essential things: assessing water quality and checking for diseases. Having a reliable lab in your area is highly beneficial, as doing these checks locally is much quicker than, for example, sending your water or shrimp sample to another city.

3. Maintain optimum alkalinity level

Alkalinity is one of the most critical water quality parameters since it directly affects pH fluctuation and bacterial composition. It is recommended to maintain alkalinity at 120–150 ppm. Maintenance of alkalinity can be done by applying bicarbonate or carbonate compounds, such as NaHCO3, KHCO3, Na2CO3, CaCO3, and CaMg(CO3)2. It is better to apply treatment periodically rather than when alkalinity spikes occur. To maximise alkalinity increase, the amount applied at each treatment time should not be more than 20 ppm.

To know the right amount of bicarbonate compounds to be applied, you need to know the current alkalinity concentration, which is why periodic measurement is important. This simple formula might help: (target alkalinity - current alkalinity concentrations)*2 Alkalinity treatment is recommended to be done at night or early morning. Bicarbonate compounds will react with carbon dioxide (CO2) which are more available at night due to respiration of all organisms.

4. Calibrate all your measurement tools

It might seem simple but before every cycle make sure that all your measurement tools are calibrated. This includes your dissolved oxygen (DO) meter, pH meter, refractometer and chemical test kit. Uncalibrated tools might cause a significant error which may lead to grave mismanagement due to inaccurate data. Calibrated tools may help you gain more accurate data on the conditions of the farm and allow them to make more educated decisions.

5. Assess post-larvae (PL) and shrimp health

Before stocking, PL from hatcheries should be checked regularly – by sight or, even better, by microscope. Shrimp health should also be assessed once a week after stocking. This is beneficial for maintaining optimal shrimp growth and detecting possible signs of disease. The key things to check are if:

* The shrimp are swimming actively

* Their morphology is normal

* Their guts are full

* They have no adhering organisms

* There is no cloudiness in the muscle

* The muscle to gut width ratio is 3:1

* The hepatopancreases are large and dark

* The gill is white or greyish

* There is no melanisation (shown by black to brownish spots)

*There is no moulting residue on the shrimp heads

*There are no cuts or twists on their bodies

6. Take shrimp samples regularly

Sampling allows farmers to understand shrimp growth and adjust the feed regime, preventing overfeeding and underfeeding. It is recommended to take shrimp samples every five to seven days using nets appropriate to the current shrimp size. Sampling is done to estimate the mean body weight (MBW), which is calculated by dividing the total weight by the number of shrimp.

What is also important to note is how to take the samples, which should be done representatively. Avoid sampling near the feed trays because the shrimp there tend to be bigger than the rest. Take random samples vertically – covering the top, middle and bottom of the water column – as well as horizontally, covering various sides of the pond. Avoid sampling when the shrimp are moulting.

7. Use the baby bucket method for sampling

The total number of PL obtained from the hatchery is usually ascertained by counting a sample of the PL bags. After stocking, farmers usually do not take follow-up samples, but it is very important to know the survival rate 24 hours post-stocking. It may give us a clearer picture of the shrimp population after they have undergone a stress-inducing process and acclimatisation.

We are experimenting with the baby bucket method for estimating the survival rate. The baby bucket is a little bucket with holes on the side covered with mesh. To take a sample, fill the baby bucket with 100 PL and leave it on the surface of the pond for 24 hours. After 24 hours, the PL can be counted to estimate the initial data on population and survival rate. The data is crucial because it can be used to adjust the right feeding regime to avoid overfeeding or underfeeding.

8. Be aware of moulting

Moulting allows shrimp to grow bigger and is a moment in the shrimp grow-out period that needs particular attention. We need to know the moulting phase the shrimp is in by taking regular samples, this way we can better prepare when moulting happens. It is better to prepare the right environment by providing enough micro and macro nutrients to help the shrimp undergo the formation of the new exoskeleton. This may help prevent moulting problems and mortalities due to failed moults. Some of the beneficial minerals to help shrimp during moulting are: Ca, Cu, Mg, Na, P, K, Se, and Zn

9. Apply probiotics at the right time

Probiotics are good bacteria which may boost shrimp growth, prevent stress and disease, as well as maintain good water quality. Probiotics are better applied at the beginning of the cycle, helping the juvenile shrimp acclimate to the new environment and enhance water quality. It is also recommended to apply probiotics during stressful situations for shrimp, such as water exchange and partial harvest. The good bacteria work by enhancing the shrimp gut health and maintaining a relatively good environment, both of which decrease the stress level.

10. Implement a nursery phase

Shrimp farmers usually stock PL from hatcheries directly to the grow-out ponds but this is risky because PLs have a relatively underdeveloped immune system. While it requires investment in infrastructure, a nursery phase helps reduce that risk by making sure that the immune systems of the PLs are enhanced before the grow-out period.

To achieve this, PL from hatcheries should be stocked in relatively small nursery ponds or tanks, with a density of more than 2000 PL/m2, for 30 days. The small size of the ponds/tanks, means that fewer probiotics are needed and these will be more effective compared to in bigger grow-out ponds, thus reducing mortalities and costs.

Conclusion - implementing the basics

We understand that each farm has specific needs and challenges. However, breaking it down to the basics, these tips are applicable to various farmers across different circumstances. We hope that these 10 simple tips can help shrimp farmers implement better management regimes for their farms.

Types of geomembrane for symbiotic aquaculture

Posted on May 18, 2021May 18, 2021

The geomembrane for symbiotic aquaculture is one of the most important elements in the beginning of aquaculture projects. The beginning entails the purchase of material machinery necessary for the aquaculture farm, fish farm or shrimp farm. In a large number of occasions, the necessary information is not available to choose the appropriate aquaculture instruments or materials. Our trajectory as project developers and consultants has given us the opportunity to identify the shortcomings that producers have at the beginning of the projects. Thus, 85% of investors and producers are lacking in information on the characteristics of the machinery and materials.

What is a geomembrane or liner for symbiotic aquaculture?

A geomembrane or liner is a waterproof sheet composed of plastic resins and chemical additives that give it certain qualities. Usually the most used additives are carbon, antioxidants and thermal stabilizers. These substances give the geomembrane mechanical resistance, against ultraviolet rays and against heat.

There are many types of geomembranes depending on the polymer they are made of. For example: PVC (Polyvinyl chloride). PP (Polypropylene). PS (Polystyrene). PET (Polyethylene terephthalate). LDPE (Low Density Reinforce Polyethylene) or HDRPE (High Density Polyethylene). Some of these polymers are used to manufacture bottles. Others for plastic packaging, others for pipes and so on. Of all of them, the geomembranes or liners most used in symbiotic aquaculture are those made with HDRPE or LDPE.

Differences between geomembranes for HDRPE and LDPE symbiotic aquaculture

HDRPE (High Density Reinforce Polyethylene) is a thermoplastic polymer of ethylene, polymerized by free radicals. Like LDPE (Low Density Polyethylene). The latter has three or four carbon atoms. It is also confused with various branches at the molecular level. This makes them have a low density and that increase their flexibility at the cost of their resistance. The HDPL has almost no ramifications. So it has a more compact structure that increases its rigidity at the cost of flexibility. In this way, HDRPE is more resistant to mechanical stress, tensile breakage or impacts than LDPE. However, this one is more flexible. Usually, for symbiotic aquaculture, the HDRPE geomembrane or liner is more used due to its greater resistance.

Why choose our HDPE geomembrane?

Because at MYPONDLINER we have all the necessary resources to offer the best option on the market in terms of cost-benefit ratio when it comes to the safe containment of toxic products.

If you want to know more about our geomembranes made with high-density polyethylene sheets, contact us and our customer service team will offer you all the information you need

INSTALLATION OF GEOMEMBRANES:

Posted on May 15, 2021May 15, 2021

We are increasingly aware of the importance of water when it comes to ensuring proper management, from its capture to its storage. The main problem derived from water treatment is due to problems with filtration. In the case of landfills, the leachates that are generated (industrial waste, slurry, etc.) can contaminate the groundwater, hence the importance of adequately waterproofing the slopes.

To ensure a correct waterproofing of the slope, the recommended material is HDRPE geomembrane for different reasons such as health, mechanical and chemical resistance, comfort and reliability during installation and its cost is affordable. It is a high-density reinforce polyethylene sheet of HDRPE focused on waterproofing reservoirs and landfills.

Next we will explain in this post the first phase when installing the HDPE geomembrane on roofs:

SUBSTRATE PREPARATION

The support indicates the waterproofing system to be used. Depending on how we prepare the support, it will influence the life of the waterproofing system.
These are the characteristics that a reservoir or spillway must present for its correct waterproofing

* Regular and uniform: the support material must be the same, with continuous granulometry and the absence of large sizes that can cause punctures. Otherwise, the best solution for the support must be studied, such as placing a protective geotextile or geocomposite to ensure the integrity of the waterproofing system.

* Compact: it is achieved, reaching the energetic compaction of 95% Proctor of the soil used, both at the bottom of the basin and on the slopes

HDRPE GEOMEMBRANE PROPERTIES

The geomembrane will be made of high-density polyethylene that is homogeneous throughout its thickness. This material is the basis of the waterproofing system, so the choice and implementation must be carefully selected. The thickness of the geomembrane depends on:

* Substrate preparation (type of aggregate)

* Membrane protection (geotextile type)

* Type of waste (for landfills)

* Total height of the landfill or reservoir water

HDPE GEOMEMBRANE PLACEMENT

The placement and extension of the geomembrane will be carried out continuously. In the same way, they will be installed on the slopes and at the base in a differentiated and independent way. The sheets, once presented, must be welded, ensuring that their temperature is the same in order to avoid tensions.
These are the steps for its placement:

* Extension and numbering of the panels

* If necessary, provisional anchoring of the same

* Welding and numbering

* Checking the welds

* Definitive anchorage

EVERYTHING YOU NEED TO KNOW ABOUT HDRPE GEOMEMBRANE

Posted on May 15, 2021May 15, 2021

What is HDPE?

It is a high-density waterproofing polyethylene geomembrane , which is manufactured under strict quality controls. Its construction is based on virgin resins that do not contain additives or fillers that can evaporate and cause deterioration as time progresses. This geomembrane, better known by its acronym in English as HDPE, is the most used material for lining in solid waste deposits in mines. In addition, others that have to do with the containment of liquids. Definitely if we should recommend where to apply it, it would be in projects with low permeability, resistance against ultraviolet rays, and exceptionally high chemicals.

Advantage

The HDPE geomembrane is of great thermal and chemical resistance. It stands out because it is not attacked by acids, it resists water at 100 ° C, flexible at low temperatures since it is made of high-density, high-molecular-weight polyethylene.

Features

The main functions of the HDPE geomembrane are waterproofing, protection and separation. For this reason, it is considered one of the most effective waterproofing systems, which combines low initial cost, high resistance and durability. Also, do not forget that for it to work well, you have to know how to choose those with adequate thicknesses, according to your application. Remember that the installation process is rigorous but that it allows a good lifetime of the HDPE geomembrane .

Applications

This type of geomembrane is often used too much in:

* The waterproofing of landfills and leachate ponds.

* In the waterproofing of platforms and slopes of roads, railways, etc.

* For coatings in water conduction channels for irrigation.

* In hydraulic and mining projects.

* In the Oxidation lagoons.

* Biodigestores.

* Tanks of Molasses.

* Hydrocarbon storage tanks.

* Artificial lakes.

* Landfills.

* Coating.

* Hoyas of rainwater catchment, and among other works.

LINERUSA PORTFOLIO

Posted on May 15, 2021May 15, 2021

We are a company that provides innovative solutions in the mining, agriculture and infrastructure sectors. We have a technical department that provides professional advice on the use of application and installation of pond liners (HDRPE). For the execution of all projects, we use materials of excellent quality, we have highly trained personnel with great experience that allows us to guarantee the satisfaction of our client.